Sign In
January 19, 2023
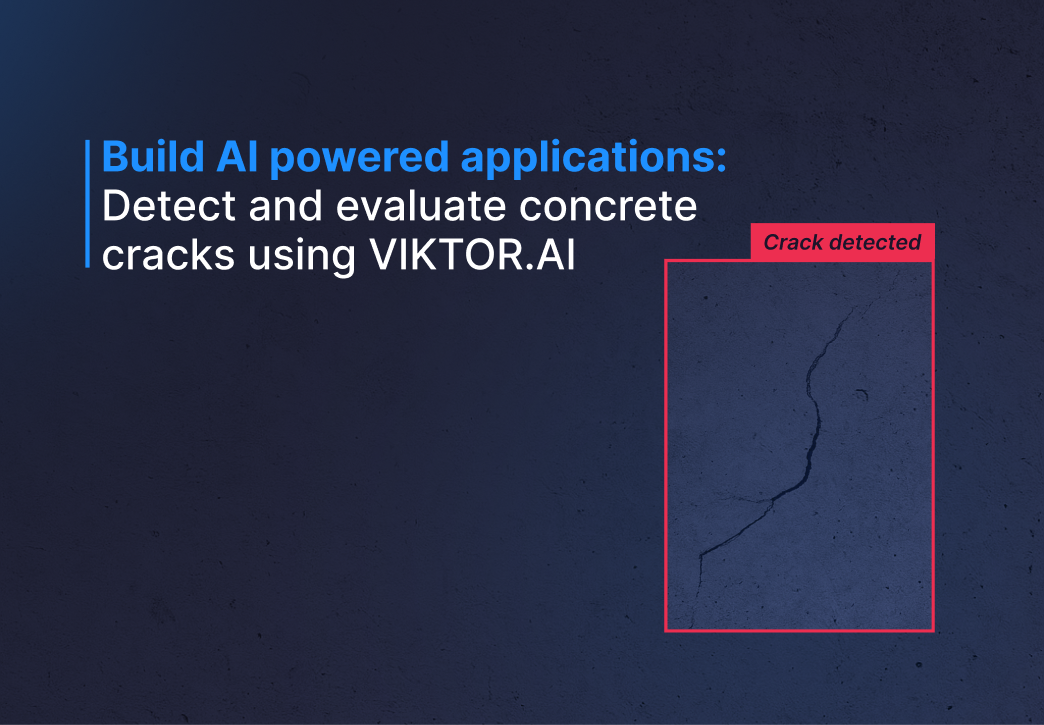
Tutorial: Build an image classification app
by VIKTOR Team
Introduction
Welcome to this tutorial on setting up an Image Classification Convolution Neural Network within a VIKTOR app. The VIKTOR platform is a powerful tool for deploying and managing machine learning models, and in this tutorial, we will be showing you how to set up a pre-trained image classification model within a VIKTOR app. Although this tutorial will not focus on the training of the model, we will briefly mention the steps required to train the model on the CIFAR-10 dataset, an image dataset containing 10 classes of various objects such as airplanes, cars, and birds. Using TensorFlow, an open-source machine learning library, to build and train the model.

By the end of this tutorial, you will have a working image classification model deployed within a VIKTOR app, and be able to use the model to classify images in real-time. This tutorial is perfect for engineers and developers who want to use pre-trained models to add image classification functionality to their projects.
Let's get started!
Step 1: Install VIKTOR
For one to be able to develop a VIKTOR app, you need a VIKTOR developer account. If you do not have one yet, visit the "Start building apps" page on the VIKTOR website and follow the instructions.
In case you are new to VIKTOR, it is recommended to also follow the build your first app tutorial before you continue with this tutorial.
Step 2: Train the image recognition neutral network (Optional)
This step is optional, as the tutorial focuses on implementing a pre-trained image classification model.
You can find all the files needed for this tutorial, including the pre-trained models, in the cnn_model folder. So, you can skip to the next step if you want. Note we generated the models using TensorFlow 2.11.0
In case you are interested in developing a model yourself, follow the instructions in this GeeksforGeeks article, on which this tutorial is based.
Just to give you an overview, we made and trained the model in the following way:
-
Install TensorFlow locally in our machine using
pip install tensorflow -
Get CIFAR-10 dataset to train the model. The CIFAR-10 dataset consists of 60.000 32x32 colour images in 10 classes: Airplane, Automobile, Bird, Cat, Deer, Dog, Frog, Horse, Ship, Truck.
-
Create a Convolution Neural Network (CNN) with 32x32 pixels as the input layer and the 10 classes as the output layer.
-
Train the model using the CIFAR-10 dataset. Use at least 10 epochs to improve the accuracy of the model.
-
Save the trained model as a .h5 file. You will use this file in the app.
If you are going train the model yourself, It is strongly advised to run this locally and not in a VIKTOR environment, as it can be time-consuming
You can use the code example train your image recognition convoluted neural network to generate your own models.
Step 3: Create an app using your trained convoluted neural network
Now, with a machine-learning model available, you can now set up your application.
- Create a new (editor-type) app template. In your terminal, write
viktor-cli create-app image-recognition-app --app-type editor - Add
tensorflow-cpu==2.11.0to therequirements.txt - Add .h5 model files to your app folder
- In your parametrization, add
FileFieldthat allows the uploading of JPEG/JPG/PNG images - If you use multiple models, add an
OptionFieldto your parametrization, allowing users to select different models
Here is some example code:
1MODEL_OPTIONS = [
2    OptionListElement(label="CNN (2 epochs)", value="cnn_cifar10_model_2_epochs.h5"),
3    OptionListElement(label="CNN (5 epochs)", value="cnn_cifar10_model_5_epochs.h5"),
4    OptionListElement(label="CNN (10 epochs)", value="cnn_cifar10_model_10_epochs.h5"),
5]
6
7
8class Parametrization(ViktorParametrization):
9    image = FileField("Upload a JPEG/JPG or PNG image", file_types=[".jpeg", ".jpg", ".png"])
10 model = OptionField("Select CNN model", options=MODEL_OPTIONS, default=MODEL_OPTIONS[0].value)- Write a function that preprocesses the uploaded image to tensor: normalize the RGB values and resize to (32, 32) pixels.
Use
tf.imagefunctionalities to do this. Finish withimg = tf.expand_dims(img, axis=0)in your conversion to align the dimensions of your image and the model.
1def preprocess_image(unclassified_image_bytes: bytes):
2    img = tf.image.decode_jpeg(unclassified_image_bytes, channels=3)
3    img = tf.cast(img, tf.float32)
4    img = img / 255.0  # normalize RGB values
5    size = (32, 32)  # size depending on size used in model, trained model is 32 x 32 pixels
6    img = tf.image.resize(img, size)
7    img = tf.expand_dims(img, axis=0)  # expand dimensions of tensor
8 return img- Create a
ImageAndDataViewto show the results (upload image and predicted classes + probabilities for example) within the Controller. - Define the logic to load the model and predict the uploaded images using the
model.predict()with the preprocessed image tensor as input to predict the class:
1CLASSES = ["airplane", "automobile", "bird", "cat", "deer", "dog", "frog", "horse", "ship", "truck"]
2
3...
4class Controller(ViktorController):
5    ...
6
7    @ImageAndDataView("Image", duration_guess=3)
8    def visualize_image_and_show_classification_results(self, params: Munch, **kwargs) -> ImageAndDataResult:
9        # Load model
10        model = tf.keras.models.load_model(params["model"])
11
12        # Preprocess uploaded image
13        unclassified_image_tensor = preprocess_image(params.image.file.getvalue_binary())
14
15        # Predict
16        pred = model.predict(unclassified_image_tensor)
17        results = [(class_name, prob) for class_name, prob in sorted(zip(CLASSES, pred.tolist()[0]), key=lambda x: x[1], reverse=True)]
18
19        # Generate results
20        data = [DataItem(label=class_name.title(), value=prob * 100, suffix="%", number_of_decimals=2) for class_name, prob in results]
21 return ImageAndDataResult(image=params.image.file, data=DataGroup(*data))- Find some JPEGS/JPG/PNG images online and test it out!
Congratulations, you are now able to deploy a locally trained Image Classification model!
How could this be used in practice?
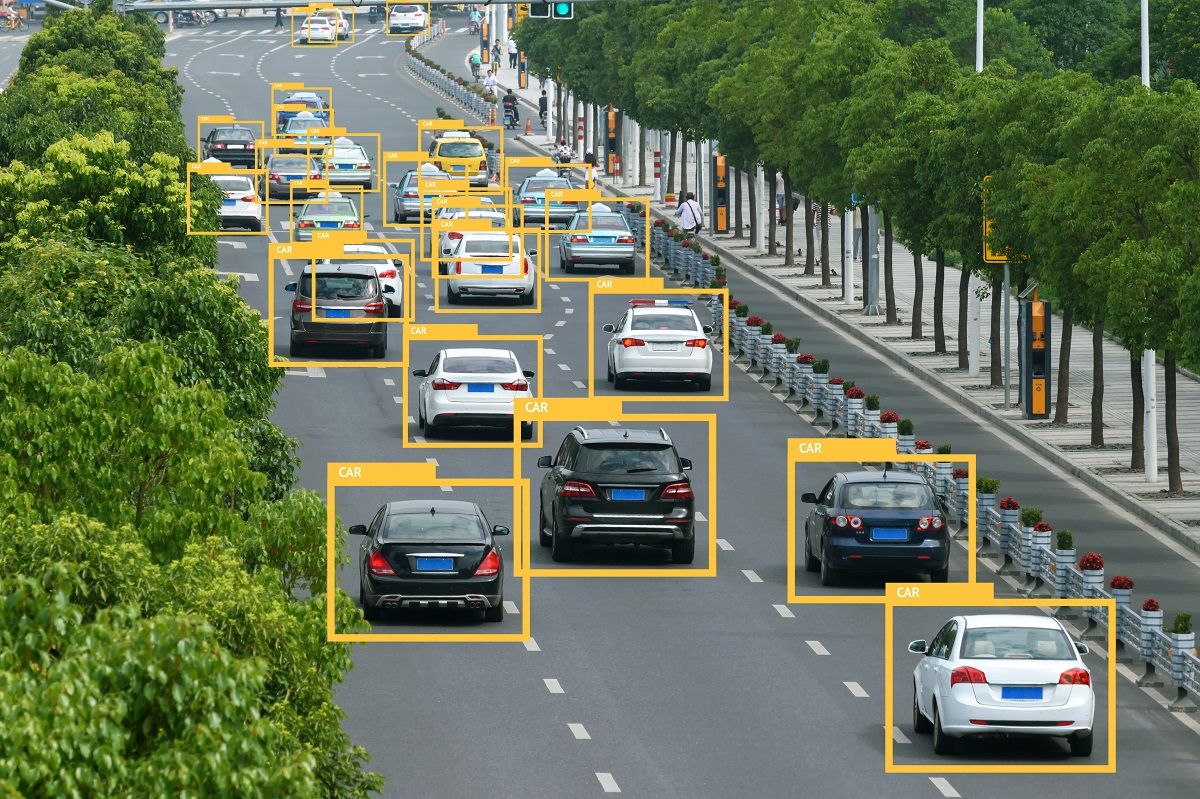
Computer vision and image recognition can be used to help engineers in a variety of ways, such as:
- Quality control: Engineers can use image recognition to inspect products for defects, such as scratches or cracks, during the manufacturing process, or to check diagrams for errors or anomalies.
- Inspection: Engineers can use computer vision to inspect infrastructure, such as bridges or pipelines, for signs of wear or damage.
- Medical imaging: Engineers can use image recognition to improve the diagnostic accuracy of medical imaging systems such as x-ray, CT, and MRI.
- Smart agriculture: Engineers can use computer vision to monitor crop growth, detect pests, and make decisions about irrigation, fertilization, and harvesting