Process automation in structural engineering, driven by programming languages such as Python, is growing exponentially due to its ability to minimize errors, reduce time, and optimize results.
SAP2000 is a finite element software by CSI (Computers & Structures, Inc), used for modeling, structural analysis, seismic-resistant design and dimensioning of structures in civil engineering projects, ranging from bridges and buildings to stadiums and dams. It allows for detailed and accurate simulations.
While SAP2000 offers a wide range of features, it can take time to perform the initial setup, modeling and extraction of results. To address this, its API allows repetitive tasks to be automated, reducing the likelihood of user error and increasing work efficiency.
Through the API, several tasks can be automated, including:
-
Templates: Define commonly used structural elements.
-
Preprocessors: Automate load applications and configurations.
-
Postprocessors: Create custom algorithms for project verifications.
-
Parametric Models: Script-based model creation and modification.
-
Custom Plugins: Develop tools to add functionality to SAP2000.
Data Exchange: Bi-directional connections with Revit and other tools.
CSI's API is currently available for SAP2000, ETABS and CSiBridge, it has been developed to be as consistent as possible between the various CSI products, allowing any tool and/or application to be easily adapted between products.
In this blog we will provide tutorials to learn how to automate data entry and extraction with the SAP2000 API.
Let's get started!
To start you should have Python installed and then configured Visual Studio Code (VS Code).
Install necessary libraries
To properly follow this blog series, you’ll need to install the comtypes, numpy, pandas, and matplotlib libraries.
You can install numpy by running “pip install numpy” at the command prompt or in the terminal. Similarly, you can install pandas by running “pip install pandas” and comtypes by running “pip install comtypes==1.1.14”.
SAP2000 API Documentation
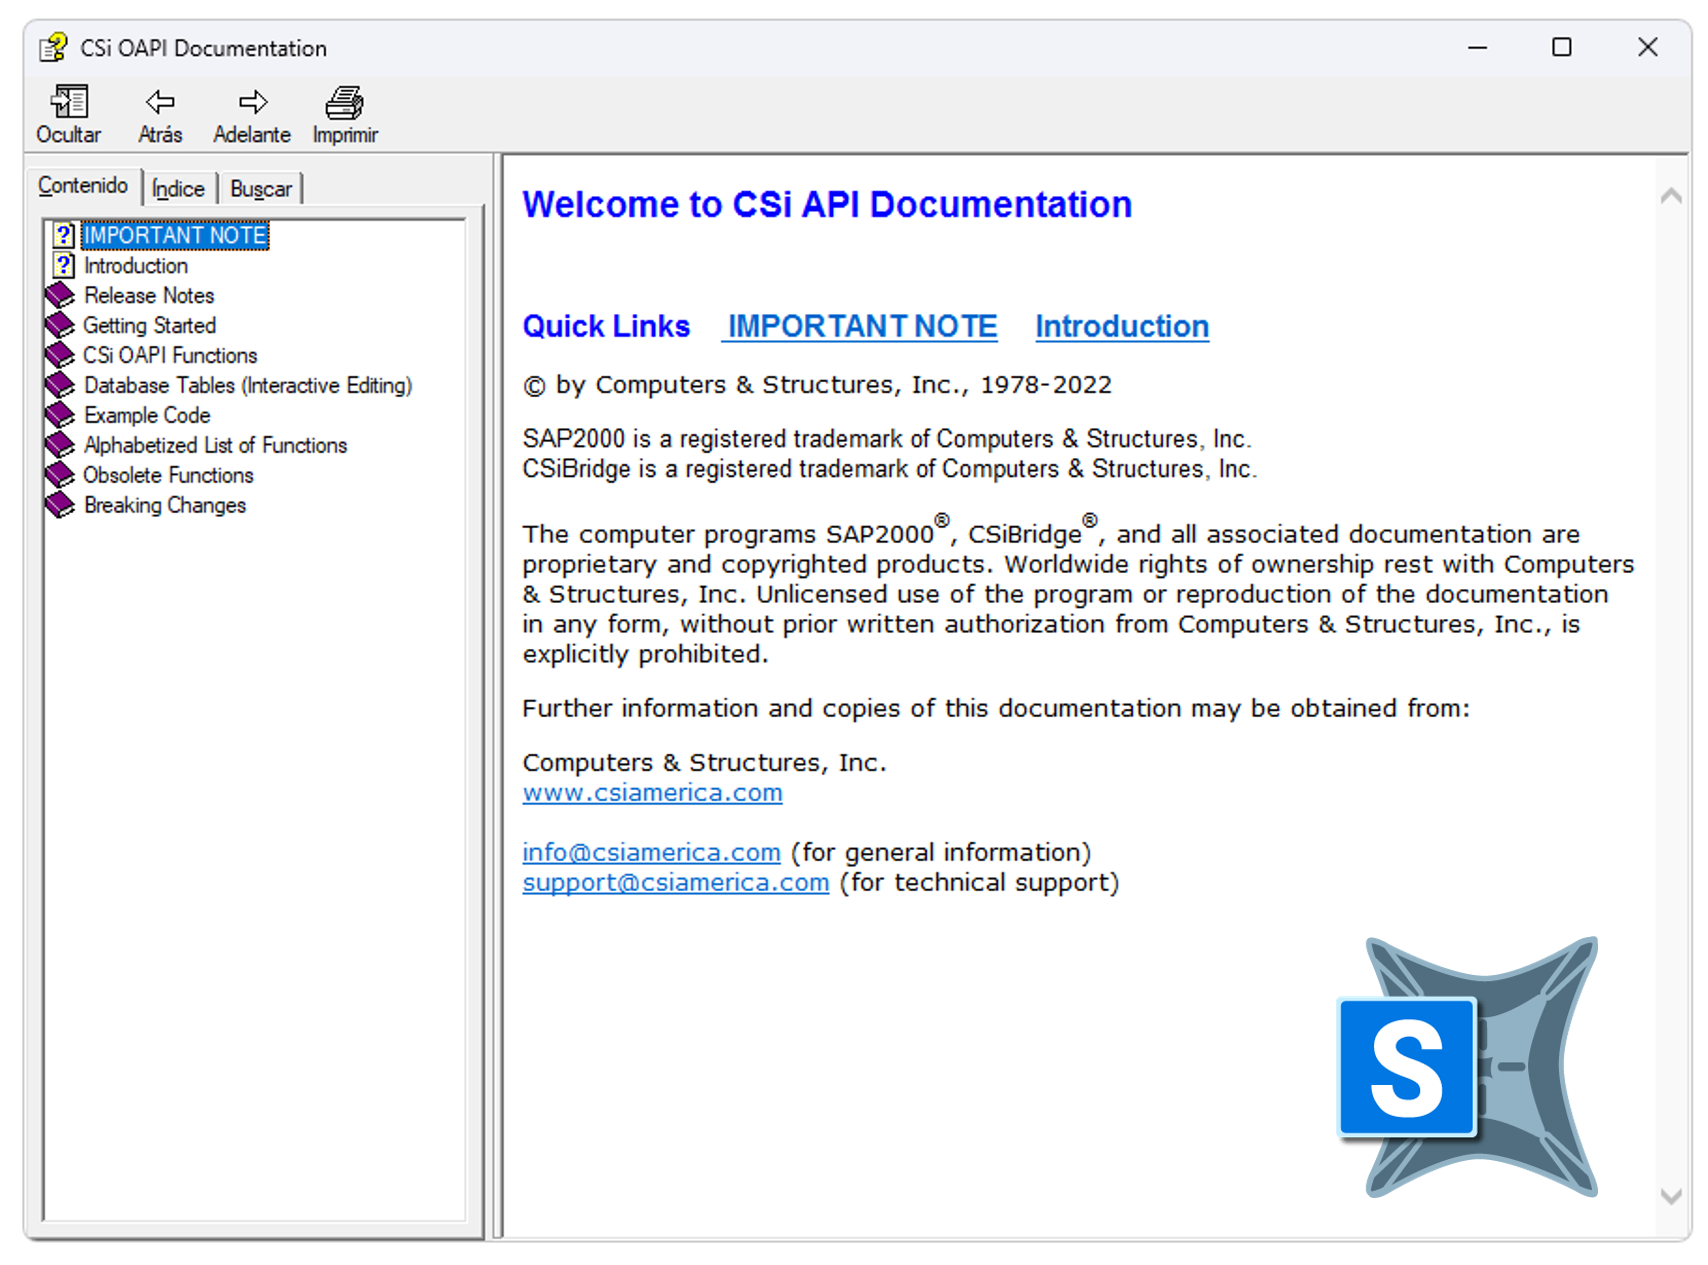
The SAP2000 API documentation provides the information necessary to use its functions and methods. It includes detailed descriptions of the functions, their parameters and usage examples.
API documentation is available within the CSI_OAPI_Documentation.chm Windows help file, located in the SAP2000 installation directory.
“C:\Program Files\Computers and Structures\SAP2000 24\CSI_OAPI_Documentation.chm”
Every action we perform in the SAP2000 software interface, such as creating a new concrete material, defining a rectangular section, assigning a distributed load to a Frame element, running the model, reading tables, and more, can be performed using Python code.
Example Code
To start using the API functions the documentation provides an example with Python where a structure is modeled, properties are defined and the analysis is executed to extract the results. To see the code used we must follow the following path in the documentation:
Example Code -> Example 7 (Python COM)
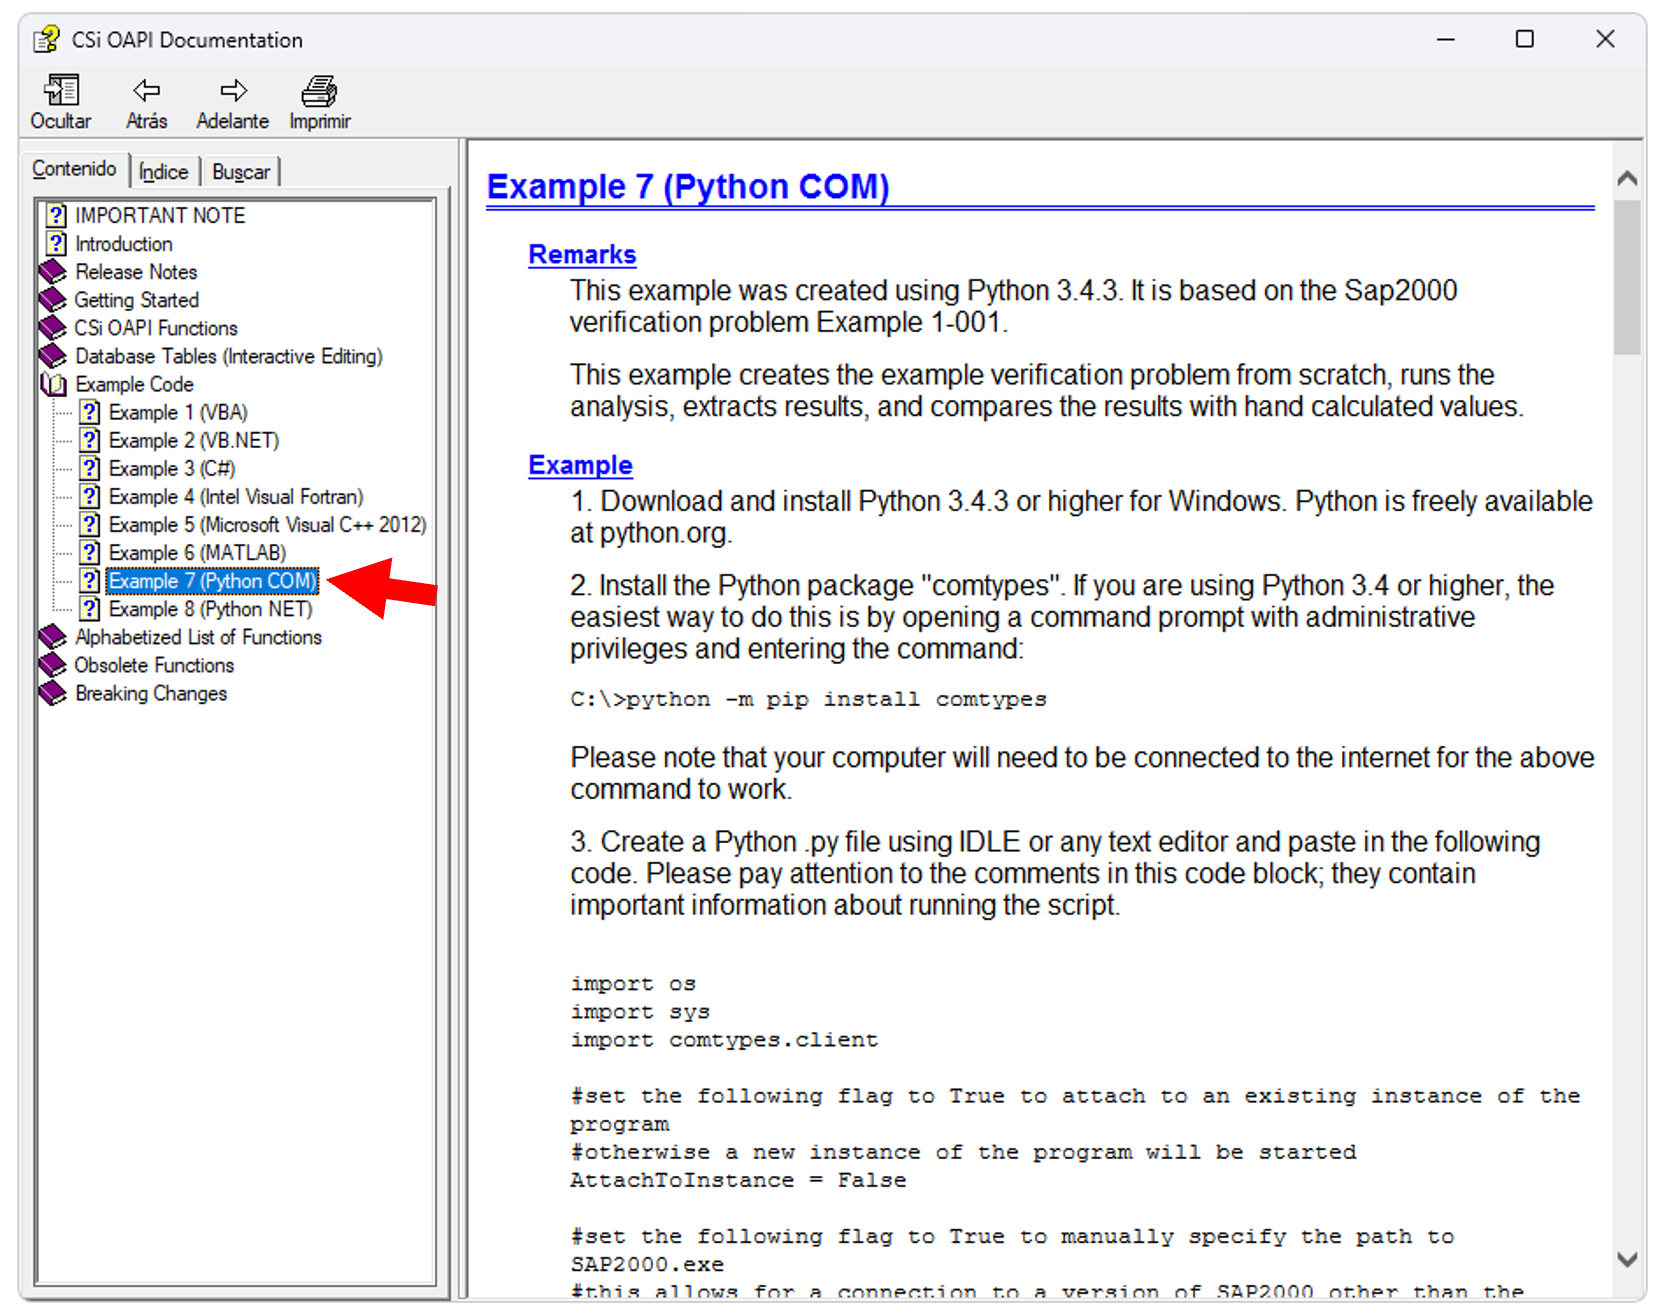
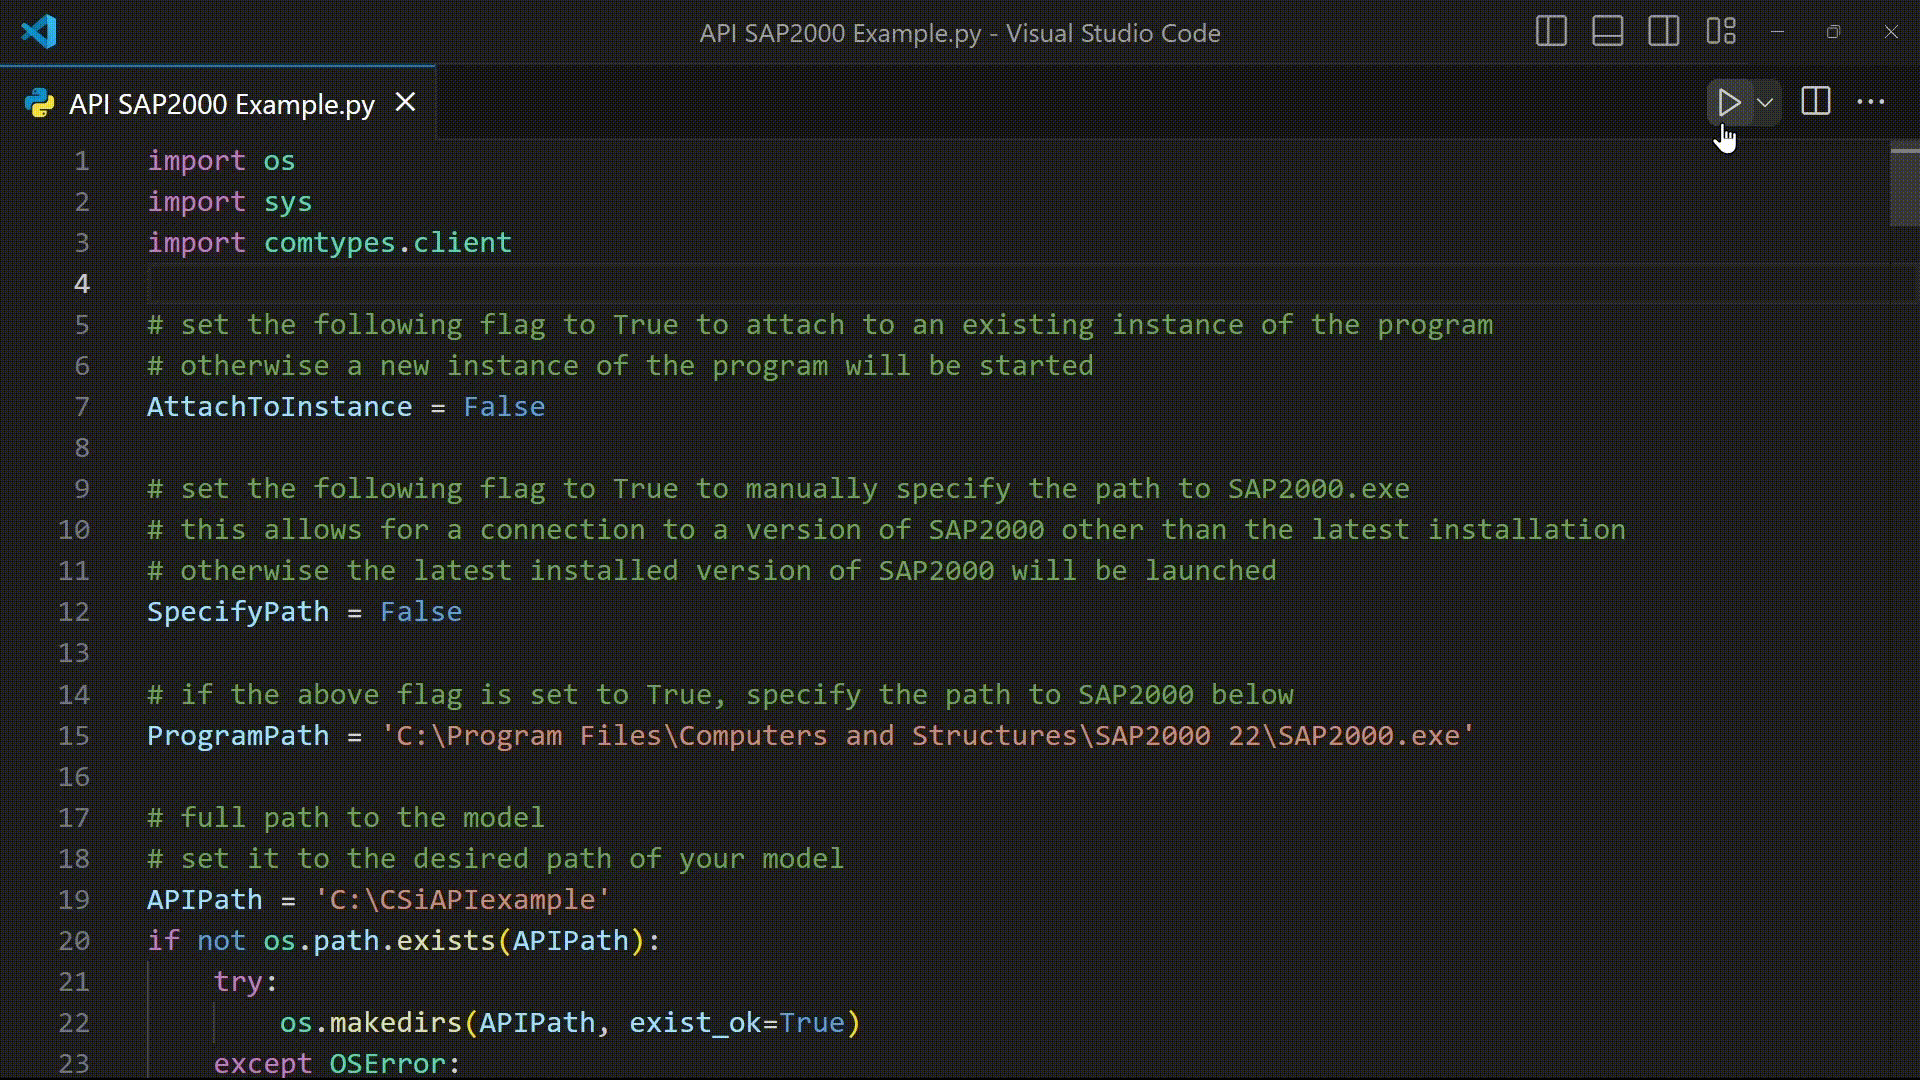
Here is the example Python file from the documentation
You will have to run the code in VS Code and wait...
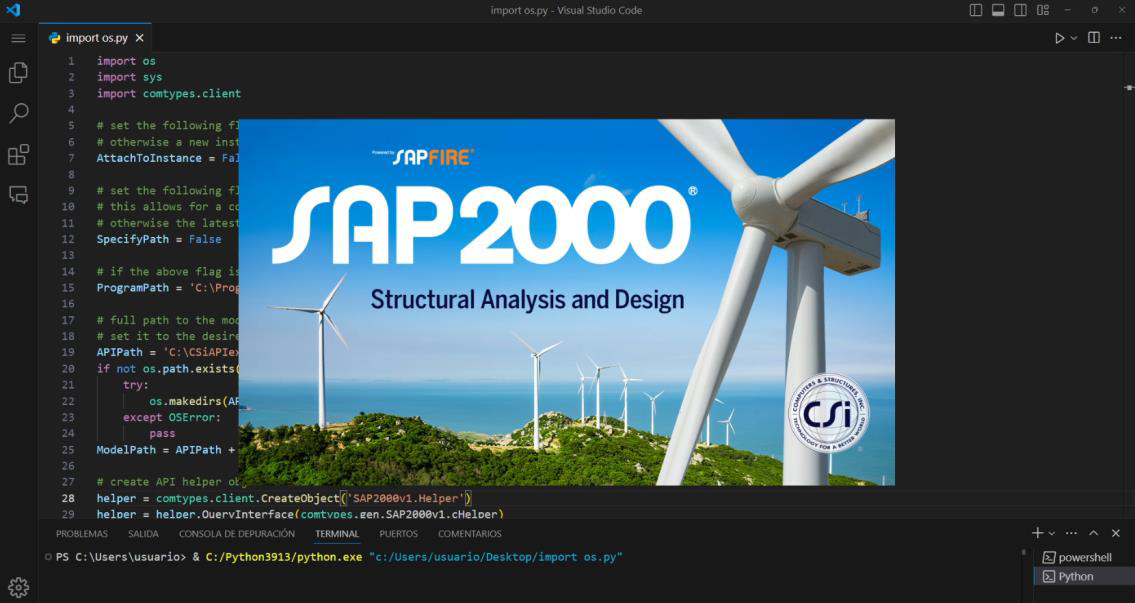
The code will automatically open SAP2000, initialize a new blank model, create a concrete material, define a rectangular Frame section, set up the units, draw the Frame elements, apply node constraints, create load patterns, assign point and distributed loads, save the model, run the analysis, extract the results from the nodes, and finally close the program.
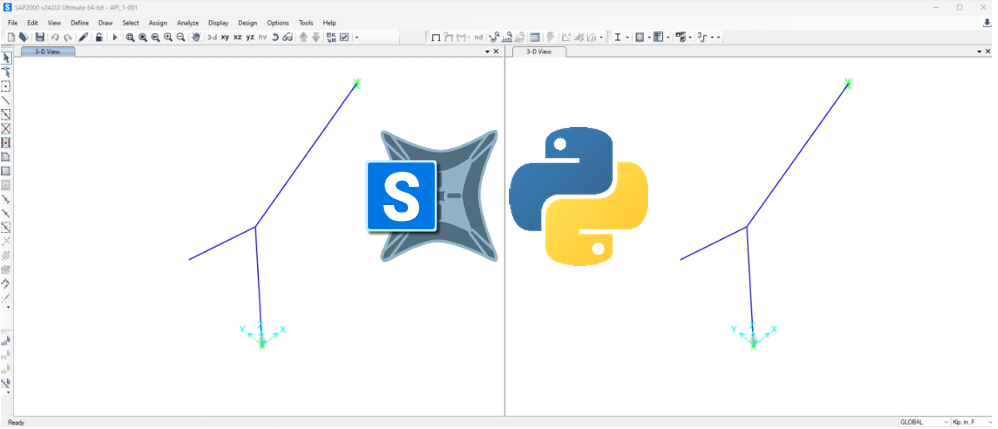
Let's break down the sample code!
The first 60 lines of the example code in the documentation will allow us to open the latest version of the SAP2000 program that we have installed. But I share with you a more summarized version of that code to open SAP2000 with Python:
1import sys
2import comtypes.client
3
4# create API helper object
5helper = comtypes.client.CreateObject('SAP2000v1.Helper')
6helper = helper.QueryInterface(comtypes.gen.SAP2000v1.cHelper)
7
8# create an instance of the SAPObject from the latest installed SAP2000
9mySapObject = helper.CreateObjectProgID("CSI.SAP2000.API.SapObject")
10
11# start SAP2000 application
12mySapObject.ApplicationStart()
13
14# create SapModel object
15SapModel = mySapObject.SapModel
A new model is started using the **New Blank Template, with the option to select other templates such as 'NewGridOnly' or 'Steel Deck'.
SapModel.InitializeNewModel()

# create new blank model
ret = SapModel.File.NewBlank()
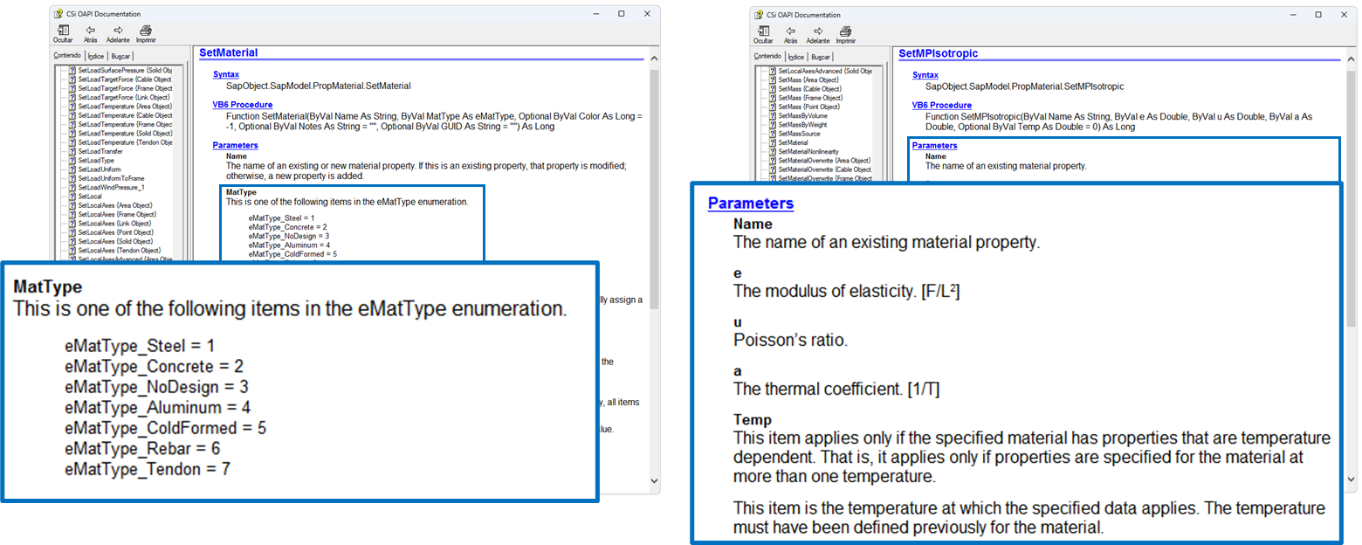
The properties of a new reinforced concrete material called “CONC” are defined using the SetMaterial method of the PropMaterial property of the SapModel object (SapModel.PropMaterial.SetMaterial), according to the documentation the enumeration for the material type Concrete is 2 and for the reinforcing steel is 6.
To define the mechanical properties and set the symmetry as isotropic, we use the SetMPIsotropic method (SapModel.PropMaterial.SetMaterial), the documentation indicates the parameters to enter.
MATERIAL_CONCRETE = 2
ret = SapModel.PropMaterial.SetMaterial('CONC', MATERIAL_CONCRETE)

# assign isotropic mechanical properties to material
ret = SapModel.PropMaterial.SetMPIsotropic('CONC', 3600, 0.2, 0.0000055)
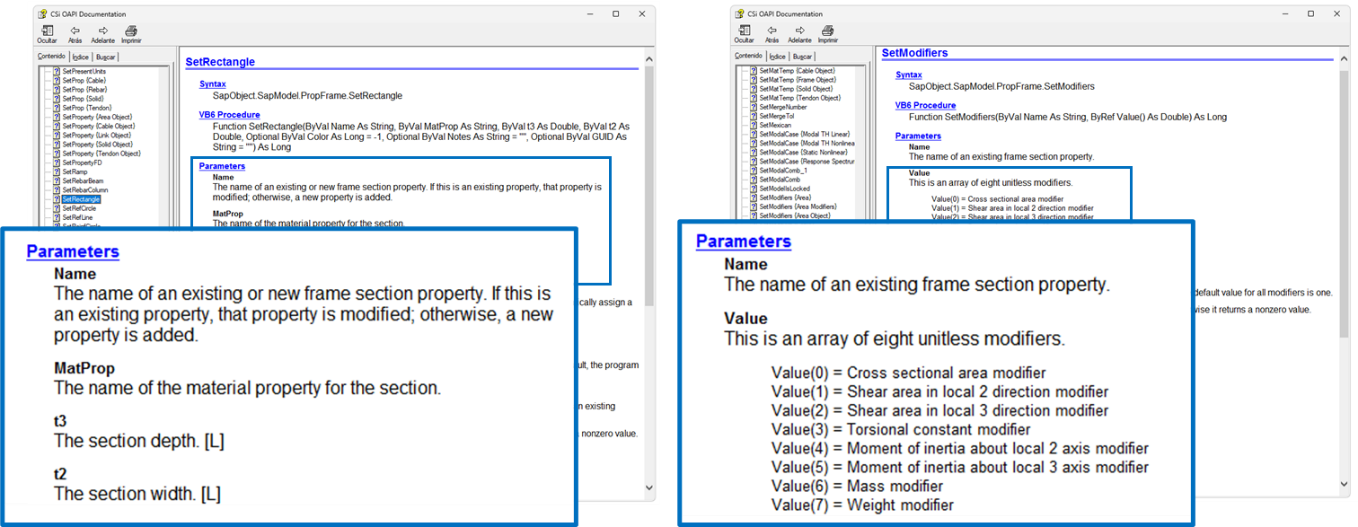
To create a rectangular section we use the SetRectangle method of the PropFrame property of the SapModel object (SapModel.PropFrame.SetRectangle). The section will be called 'R1' and will be associated with the previously defined 'CONC' material. Its dimensions will be 12 inches by 12 inches. In addition, for defining section property modifiers, the SetModifiers method is used. It is crucial to use the API documentation to understand the necessary parameters.
ret = SapModel.PropFrame.SetRectangle('R1', 'CONC', 12, 12)

# define frame section property modifiers
ModValue = [1000, 0, 0, 1, 1, 1, 1, 1]
ret = SapModel.PropFrame.SetModifiers('R1', ModValue)
Note that when defining the mechanical properties of the material and the geometry of the section. By default, we are working in kip, inches, and degrees Fahrenheit."
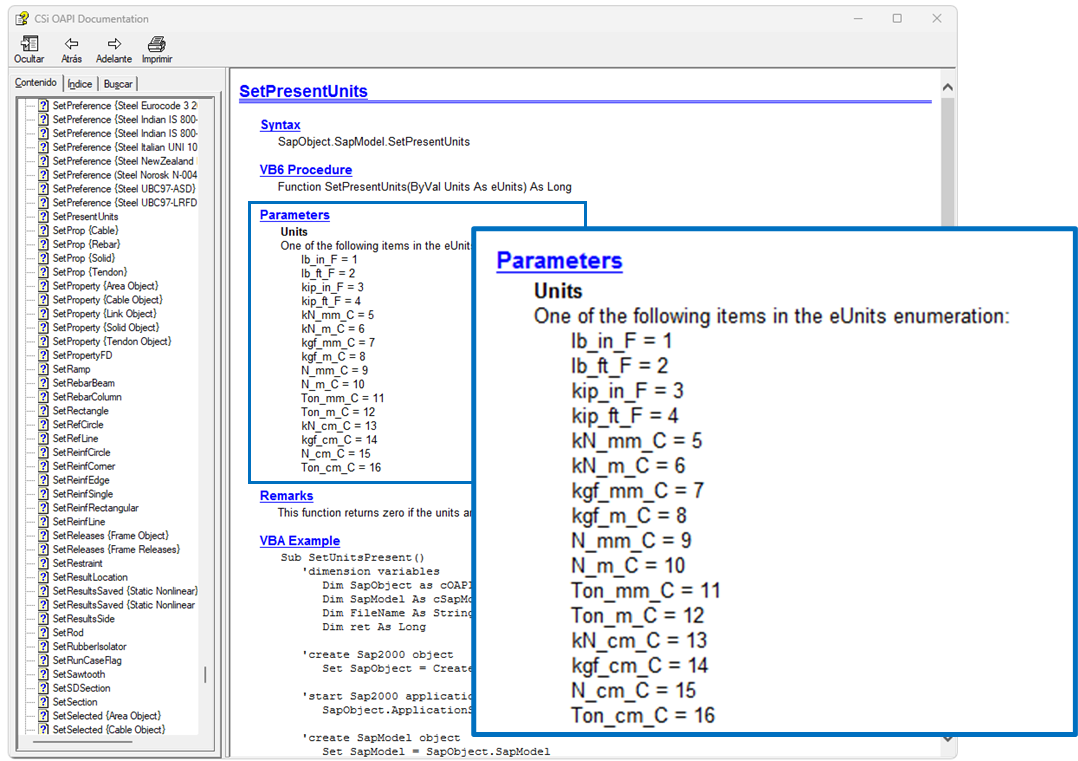
To change the unit system, use the SetPresentUnits method. This is critical if you need your input/output data in specific units. The documentation lists the enumeration for each type of combination of force, length and temperature units.
kip_ft_F = 4
ret = SapModel.SetPresentUnits(kip_ft_F)
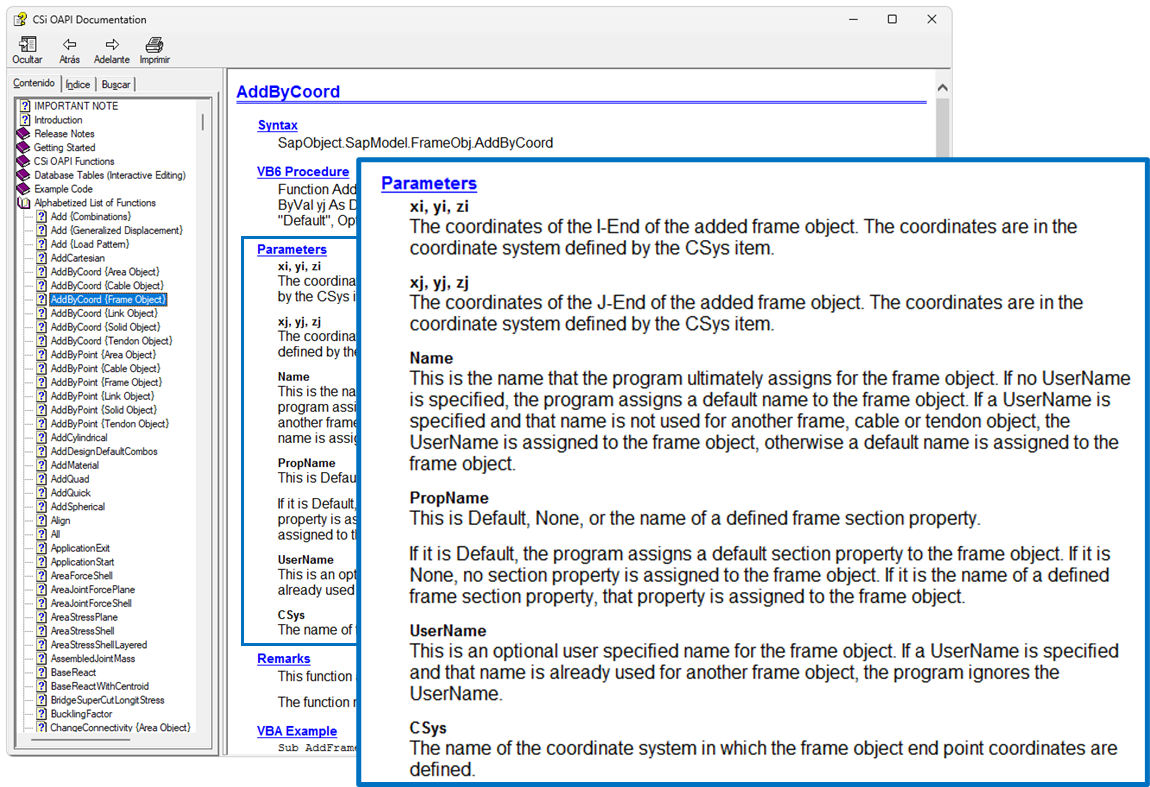
With the AddByCoord method of FrameObj (SapModel.FrameObj.AddByCoord) the Frame elements defined by their start and end coordinates will be drawn, and the “R1” section created earlier is assigned to them. To know the necessary parameters, we must use the API documentation. Where the parameters Name, UserName and CSys are options or default parameters.
FrameName1 = ''
FrameName2 = ''
FrameName3 = ''
[FrameName1, ret] = SapModel.FrameObj.AddByCoord(0, 0, 0, 0, 0, 10, FrameName1, 'R1', '1', 'Global')
[FrameName2, ret] = SapModel.FrameObj.AddByCoord(0, 0, 10, 8, 0, 16, FrameName2, 'R1', '2', 'Global')
[FrameName3, ret] = SapModel.FrameObj.AddByCoord(-4, 0, 10, 0, 0, 10, FrameName3, 'R1', '3', 'Global')
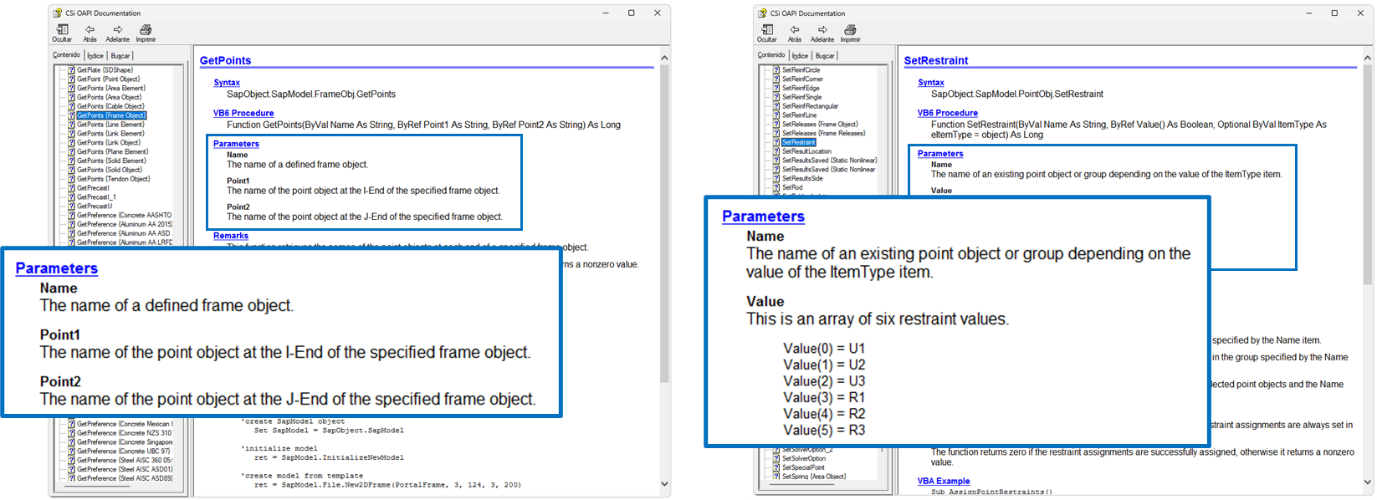
To assign restrictions to a node we use the SetRestraint method of PointObj (SapModel.PointObj.SetRestraint) but for this we will need to obtain the UniqueName of the Frame node to which we will assign the restrictions, for this we will use the GetPoints method of FrameObj (SapModel.FrameObj.GetPoints).
PointName1 = ''
PointName2 = ''
Restraint = [True, True, True, True, False, False]
[PointName1, PointName2, ret] = SapModel.FrameObj.GetPoints(FrameName1, PointName1, PointName2)
ret = SapModel.PointObj.SetRestraint(PointName1, Restraint)

# assign point object restraint at top
Restraint = [True, True, False, False, False, False]
[PointName1, PointName2, ret] = SapModel.FrameObj.GetPoints(FrameName2, PointName1, PointName2)
ret = SapModel.PointObj.SetRestraint(PointName2, Restraint)
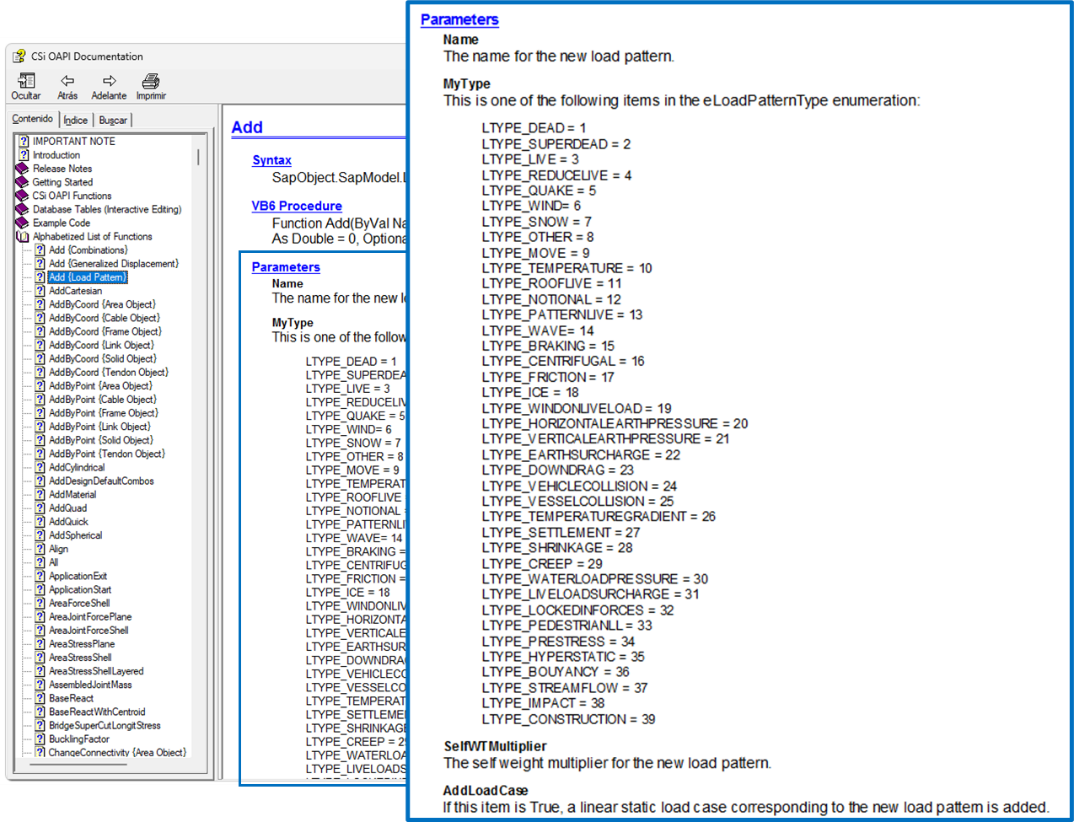
To add load patterns the Add method of LoadPatterns is used. Each load pattern is defined by a name and a load type. Consulting the documentation is essential to understand the enumeration of load types.
LTYPE_OTHER = 8
ret = SapModel.LoadPatterns.Add('1', LTYPE_OTHER, 1, True)
ret = SapModel.LoadPatterns.Add('2', LTYPE_OTHER, 0, True)
ret = SapModel.LoadPatterns.Add('3', LTYPE_OTHER, 0, True)
ret = SapModel.LoadPatterns.Add('4', LTYPE_OTHER, 0, True)
ret = SapModel.LoadPatterns.Add('5', LTYPE_OTHER, 0, True)
ret = SapModel.LoadPatterns.Add('6', LTYPE_OTHER, 0, True)
ret = SapModel.LoadPatterns.Add('7', LTYPE_OTHER, 0, True)
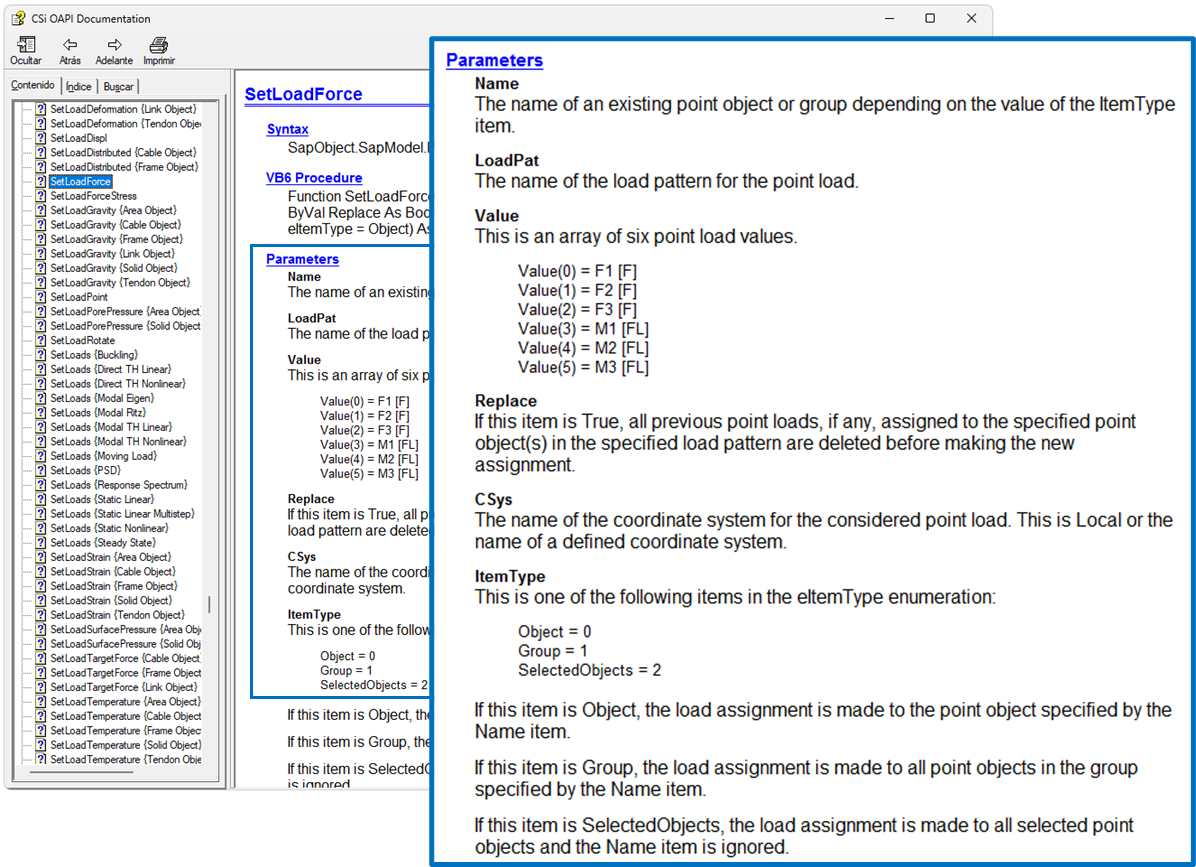
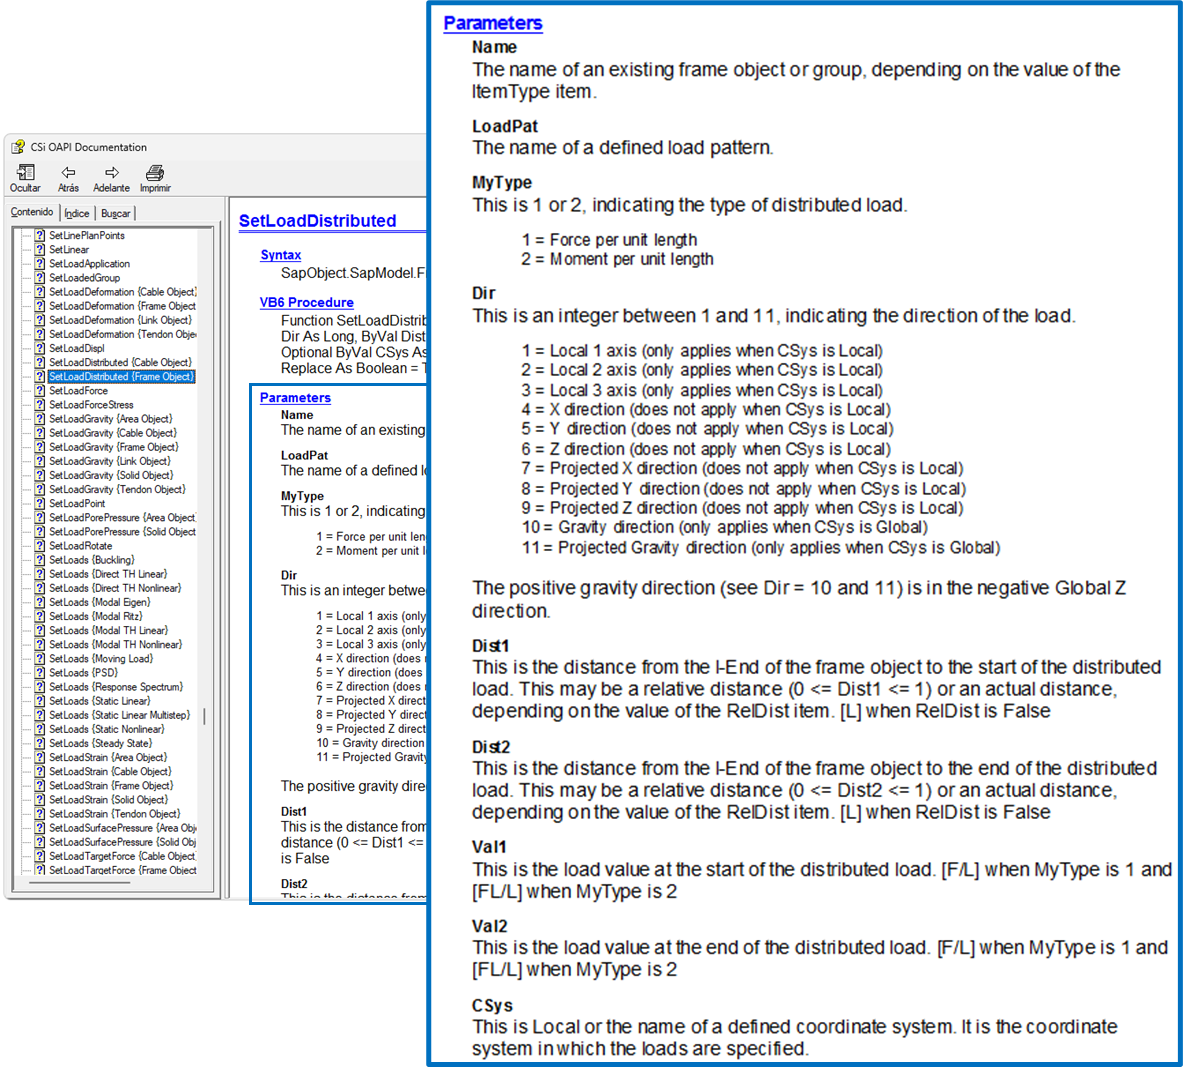
To assign forces to a node, we first obtain the UniqueName of the node through the GetPoints method of FrameObj. Then, we use the SetLoadForce method of PointObj to assign a point load to one of the ends of the frame. Distributed loads are applied through the SetLoadDistributed method of FrameObj. Here, the documentation will guide you to understand the parameters that define the magnitudes of the loads and the directions in which they are applied.
[PointName1, PointName2, ret] = SapModel.FrameObj.GetPoints(FrameName3, PointName1, PointName2)
PointLoadValue = [0, 0, -10, 0, 0, 0]
ret = SapModel.PointObj.SetLoadForce(PointName1, '2', PointLoadValue)
ret = SapModel.FrameObj.SetLoadDistributed(FrameName3, '2', 1, 10, 0, 1, 1.8, 1.8)

# assign loading for load pattern 3
[PointName1, PointName2, ret] = SapModel.FrameObj.GetPoints(FrameName3, PointName1, PointName2)
PointLoadValue = [0, 0, -17.2, 0, -54.4, 0]
ret = SapModel.PointObj.SetLoadForce(PointName2, '3', PointLoadValue)

# assign loading for load pattern 4
ret = SapModel.FrameObj.SetLoadDistributed(FrameName2, '4', 1, 11, 0, 1, 2, 2)

# assign loading for load pattern 5
ret = SapModel.FrameObj.SetLoadDistributed(FrameName1, '5', 1, 2, 0, 1, 2, 2, 'Local')
ret = SapModel.FrameObj.SetLoadDistributed(FrameName2, '5', 1, 2, 0, 1, -2, -2, 'Local')

# assign loading for load pattern 6
ret = SapModel.FrameObj.SetLoadDistributed(FrameName1, '6', 1, 2, 0, 1, 0.9984, 0.3744, 'Local')
ret = SapModel.FrameObj.SetLoadDistributed(FrameName2, '6', 1, 2, 0, 1, -0.3744, 0, 'Local')

# assign loading for load pattern 7
ret = SapModel.FrameObj.SetLoadPoint(FrameName2, '7', 1, 2, 0.5, -15, 'Local')
After saving the model using the File.Save method, specify the file path with the ModelPath variable.
# set it to the desired path of your model
APIPath = 'C:\\CSiAPIexample'
os.makedirs(APIPath, exist_ok=True)
ModelPath = APIPath + os.sep + 'API_1-001.sdb'

# save model
ret = SapModel.File.Save(ModelPath)
To run the model analysis the Analyze.RunAnalysis method is used.
# run model (this will create the analysis model)
ret = SapModel.Analyze.RunAnalysis()
And your model is ready!
What's next?
Using Python is a game changer in structural engineering. If you master the skills to automate your work with Python, you stand out from the crowd. Rather than dealing with repetitive tasks, Python allows you to spend more time creating innovative solutions.
With VIKTOR, you can turn your Python automations into intuitive and sharable web apps that further streamline your workflow, boost your team's efficiency, and enable you to deliver optimal solutions within no-time.

