
Download the White Paper and get INSPIRED
Learn about trends in digital transformation and how they affect the engineering and construction industry.
Cone penetration testing
In many construction projects a cone penetration test (CPT) is converted to a soil layout. The data of such a CPT is often filtered based on the layer thickness, because very small layers (e.g. 4 cm) are not realistic. A CPT is a soil measurement, obtained by inserting a probe into the ground which measures the resistance.
Algortihm for classification
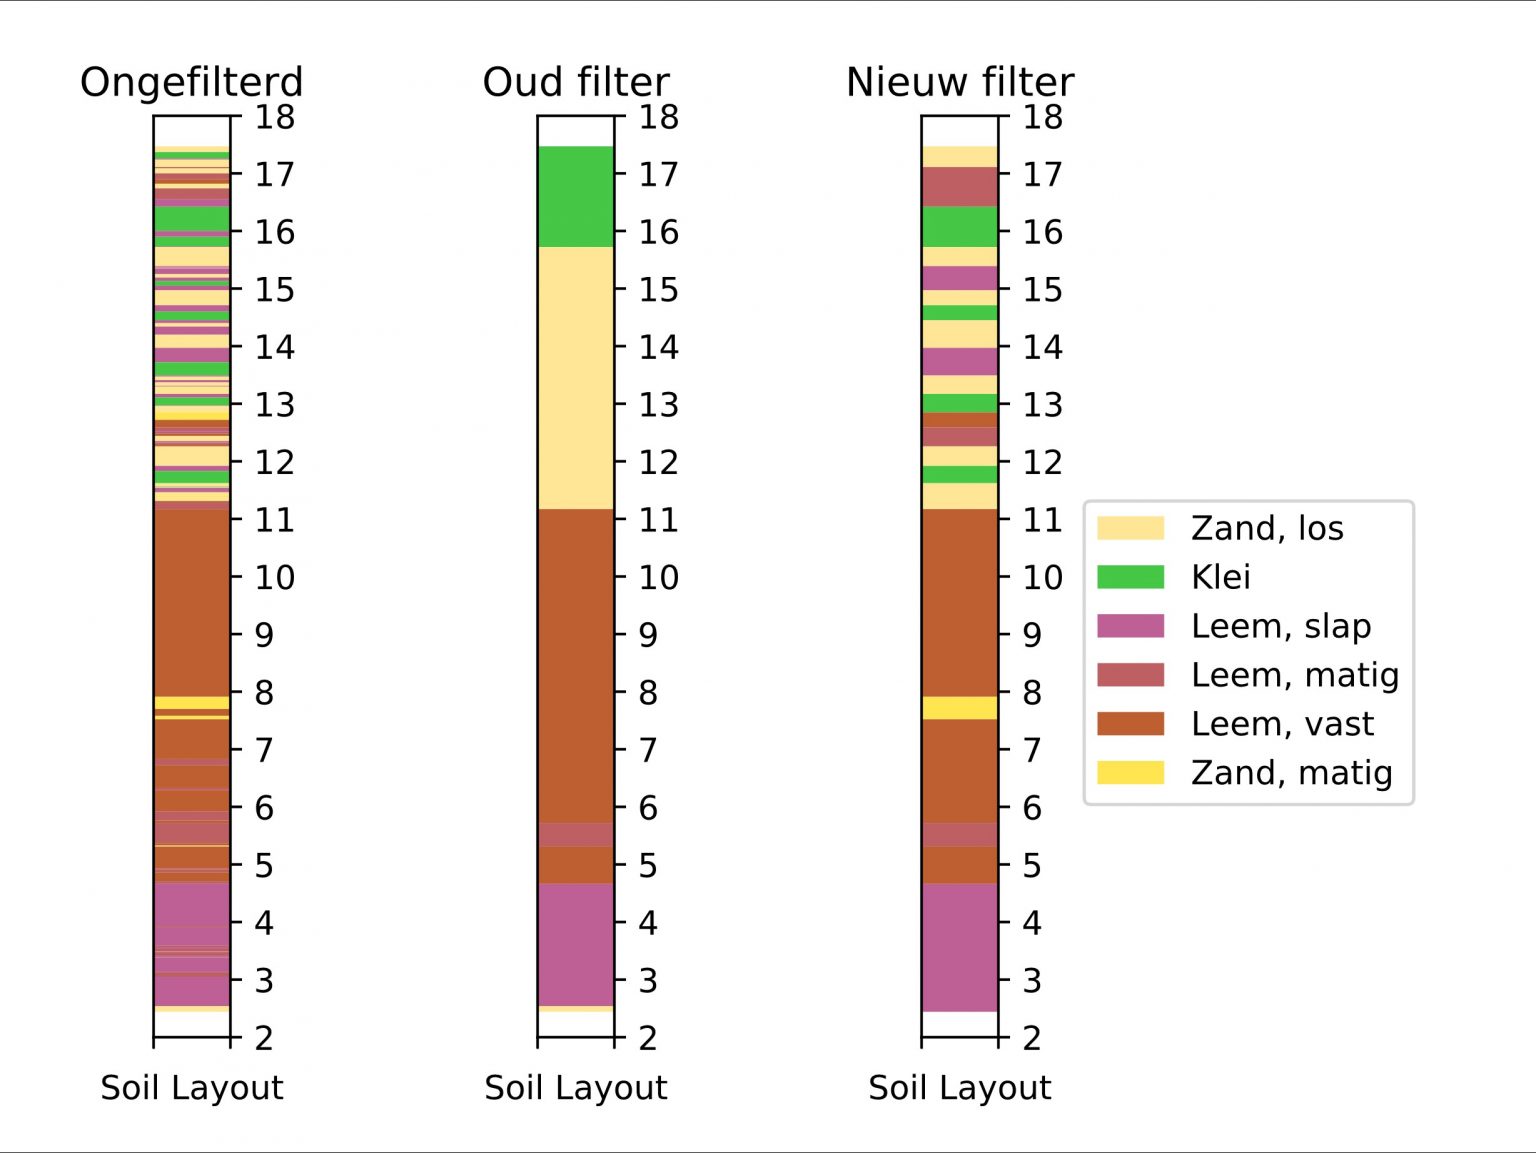
This resistance varies between different types of soil, allowing identification of the soils that are present. Roeland: “The difficult part is that the slightest measurement deviation can already result in a different type of soil, when the classification consists of many soil types.” In the picture here you can see an example of an unfiltered soil layout on the left. The thin layers are not realistic and have to be filtered. In the old algorithm, the user could specify the minimum soil thickness (e.g. 10 cm) which have to be removed from the soil layout. These layers are replaced by the soil which is present on top, such that there are no gaps in the overall layout. “This method works well, but is rather coarse.”, says Roeland.

Example of filtering of soil layouts respectively without a filter, with the old filter, and with the new filter
Continuous improvement
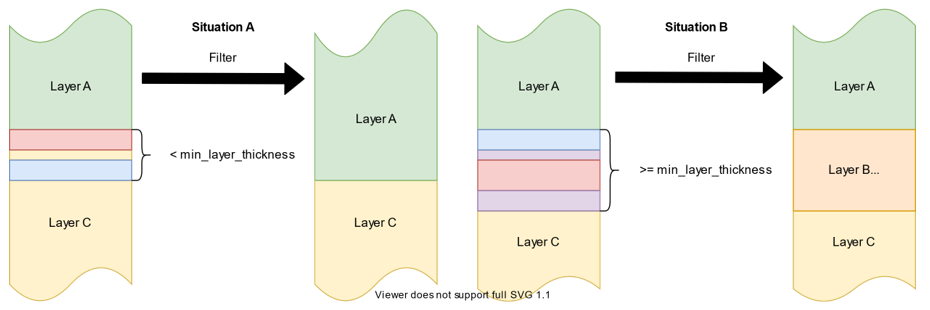
VIKTOR is continuously improving, so when the request came in to improve this filter algorithm, Roeland accepted the challenge. He explains: “Now we do not simply remove the thin layers, but we mark which layers are smaller than for example 10 cm. These layers are clustered to form individual layers with a maximum thickness equal to the specified filter thickness.”
Why an algorithm?
The way a cluster is replaced depends on the thickness. If the total thickness of the individual layers is still thinner than the filter thickness, the old algorithm is used. The layers are removed and replaced by the soil present on top. If the cluster thickness is larger than the filter thickness, a new layer is formed. “A soil type has to be assigned to this newly created layer. The soil which is the most occurent within the cluster is automatically selected.” This logic is visualised in this schematic:
The difference between now and then
Roeland: “With the improved filter, the soil layout is classified less coarse.” The difference between the old and new Python algorithms seems large in the first example, however Roeland states that this is not always the case. “In many cases it is not very likely to see such a large amount of different soil layers.” The old filter will not become obsolete, as many projects do not require the level of detail the improved filter offers.
Soil layout interpretation
Many projects make use of the soil layout classification, which may become more accurate with the improved filter. However, in the end the technical advisor will always be the one making the decision of how the soil layout should be interpreted. Roeland: “When it comes to classification of a soil layout, a lot of expertise is required. Based on geological knowledge, experience from previous projects, location data, etc. the advisor will determine the soil layout.”
This improved filter will soon be available in the VIKTOR platform. Roeland: “We are trying to continuously improve our product and I think this is a great example of such an improvement.”

